Thursday, April 4, 2013

Elegant Roses Card by Sue Smyth


This simple little card is made with Joe's Garden Embossing Folder from the All Occasions Collection and Couture Creations Sponge Daubers.
They allow you to control the amount of ink you want to put on each flower and leaf.

Materials 
 
Other Products Used
Aged Wine Cardstock
White and Green Cardstock
Pale Pink and Pesto Chalk Ink
Ribbon Rose
Grosgrain white ribbon 
Leaf punch


With Your Own Money

Do you remember your first clothing purchase? The very first article of clothing that you ever bought “with your own money”? I do!

I remember that it was 1977 and I was working at a small variety store in our little town called Cornets. Remember that store? It was what Wal-Mart or Target is now, a place where you could find anything from baby clothes to candy, patterns and fabric to rakes and brooms, women’s underwear and motor oil!

I was working there part-time while I attended Bakersfield College where I was earning my Associates Degree in accounting even though I am the worst mathematical mind in the history of numbers…but that is another story for another time!

There was a small clothing store in Shafter, right on main street, called Johnson’s Department Store. It was a very fancy store in my eyes and I would go in there often with my mom and just look around. One day I saw a sweater and I fell in love. This sweater, it was no big deal, nothing unusual or fabulous about it, the only reason it stood out for me is that it was pink and I loved pink and I had never owned anything of my own that was pink (my mom’s fav color was red, so my closet abounded with red clothing).


The Sweater was almost identical to this one.


The sweater was $34.99…a fortune in those days. I tried it on and swooned when I caught my reflection in the mirror and saw how drop dead gorgeous I was in pink! But I knew my parents couldn’t afford it so I told my mom that it didn’t fit or I didn’t like it…some excuse, I don’t remember now. But I dreamed of that sweater off and on for weeks. I was drawn to it every time that I went back to the store. Obviously I was the only one enamored of this sweater since week after week it was still there!

One day while visiting and lovingly fondling my sweater I saw a sign that said “ASK US ABOUT OUR FREE LAY-AWAY PLAN”. So I asked and was amazed to realize that for a mere $5.00 I could have them place the sweater in their lay-away bin and I could come back each week on payday and give them another $5.00 and once the balance was paid I would own my sweater! I was beyond happy to know that finally my beloved sweater would be mine, so I put that puppy on lay-away!

Every Friday I faithfully went in and paid the $5.00 and in just a few short weeks, about 8 of them, that sweater belonged to me. I was so proud of myself and so happy to have something so gorgeous hanging in my closet there amongst all the red clothing my mom had bought for me!

I went back to Johnson’s Department Store after that and continued to put clothes on lay-away for a few years until I switched jobs to a Montgomery Wards Store and they gave me a credit card…it was all downhill from there, you know how it is once you get into credit card debt! But I always remember how proud I was of myself for being able to buy my own clothes and not having to rely on my parents, it was a great feeling! Do you remember the first thing you ever bought “with your own money”? How did it make you feel


Wednesday, April 3, 2013

Spring: The Beginning of Change

I don't know about you, but I am just LUUVIN this spring weather. 
At the beginning of the week, I had the chance to take Lady on a walk through the park.
SMILE. 
I adore the warmer air, the fresh colors, and the smell of change. 
Sidenote: Okay isn't that little face on the right just the cutest! Just sayin...


For me, spring always brings new beginnings and a fresh outlook on life.
And this year it couldn't be more true.
Winds of change are rolling in -
and just like the weather - things are still uncertain.

This year I am choosing to twirl with the wind.
I cant help but think that all we have to look forward to is clear skies and sunshine.
Welcome spring.
You certainly feel good.


Gift Box and Card by Bridget Louw

Hi everyone, its Bridget here to share a quick and easy Easter project I made using an few amazing products from Couture Creations.


I am guilty of always leaving things until the last minute and Easter is no exception. Bottom line, I needed a small Easter gift and I needed it FAST. I came up with this Easter egg box and card thanks to my Couture Creations dies.


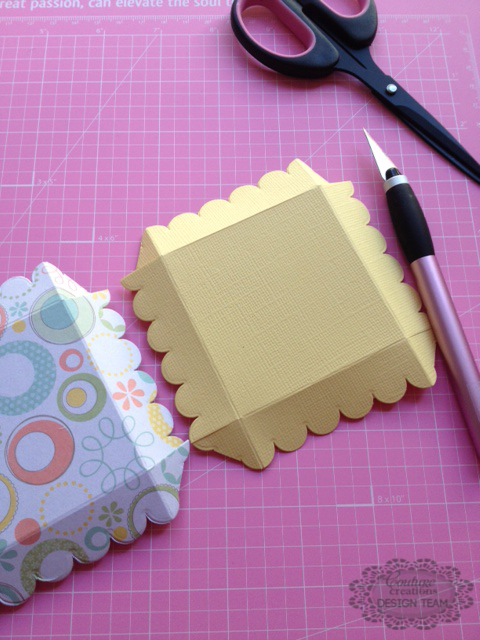
To create the base and lid, and using Nesting Dies: Scallop Square (C0723043), I cut out the largest square, once out of patterned paper and once out of plain cardstock.


I score each side at ¾” and cut slits in all four sides. I also cut off the large circle in each corner as when you tuck the slits in to form the lid, the circles stick out.


Cut a piece of acetate at 4” x 10 ¾” and scored it as follows: 2 5/8”, 5 ¼”, 7 7/8” and 10 ½”. Place strong adhesive and the remaining ¼” and assemble.


I created a box “inner” for the egg to rest on from the plain cardstock. Cut a square 3 ¼” x 3 ¼”, score at 3/8” on all four sides and cut slits as per the picture. Die cut a small circle in the center for the egg to rest in.


Place the base on the acetate box, insert the egg inner, add the egg and put on the lid. Tie a ribbon around the box and that’s the first part done.


For the card, cut a piece of plain cardstock 4” x 8’ and score at 4”. Cut a piece of patterned paper at 3 ¾” x 3 ¾”.
Using the Nesting Dies: Oval (C0723044) cut the 3rd largest oval Nesting Dies: Scalloped Oval (C0723045) out of patterned paper. Cut the 3rd largest scalloped oval, out of white cardstock, stamp your image and colour it in using your preferred colouring method. I used Markers. When finished attach the oval to the scalloped oval. Using the smallest dies in both sets, repeat this process for the sentiment.


Pop both the large and small oval sets up on Foam mounting Tape (C0721963).


Assemble your card as per the picture. There you have it, all done and ready to give as a gift. This quick project can be used for any occasion.
 

There you have it, all done and ready to give as a gift. This quick project can be used for any occasion.

Couture Creations products used
C0723043 Nesting Dies: Scallop Square 
C0723044 Nesting Dies: Oval
C0723045 Nesting Dies: Scalloped Oval
C0721963 Foam mounting Tape

Other products used
White Cardstock
Yellow Cardstock
Patterned Paper
Duck Stamp
Markers
Organza ribbon


Tuesday, April 2, 2013

100th Post: Blog Swap

Well it is official... this is my 100th blog post. 
Since starting a blog I have gained so many new friends and acquaintances.
It has been a wild ride and so much fun!
In honor of my 100th post, I would like to do a button swap!
Leave a comment below with your blog address so I can come find you and post your button on my blog!
You can grab my button below! 
Thanks for visiting!


all things

Super Marina Birthday Cards by Jo Piccirilli

Hi everyone and thanks for stopping by. 
 
This is my first post as a Design Team member for Couture Creations and I have to say I'm a little excited!
 
It was like Christmas when I opened my package and the first thing that caught my eye was the gorgeous embossing folder from the beautiful Elegance Collection - Super Marina.  I decided I would make some cards with it.
 
Here are my cards


To make these cards I ran some co-ordinations cardstock with this gorgeous embossing folder through my cuttlebug.


I then sanded the top layer very gently with a sanding block to leave the white of the frame showing and also stitched around the edges.  I hand stitch all my work using a paper piercer . I also then inked around the edges with a brown inkpad and a sponge dauber.


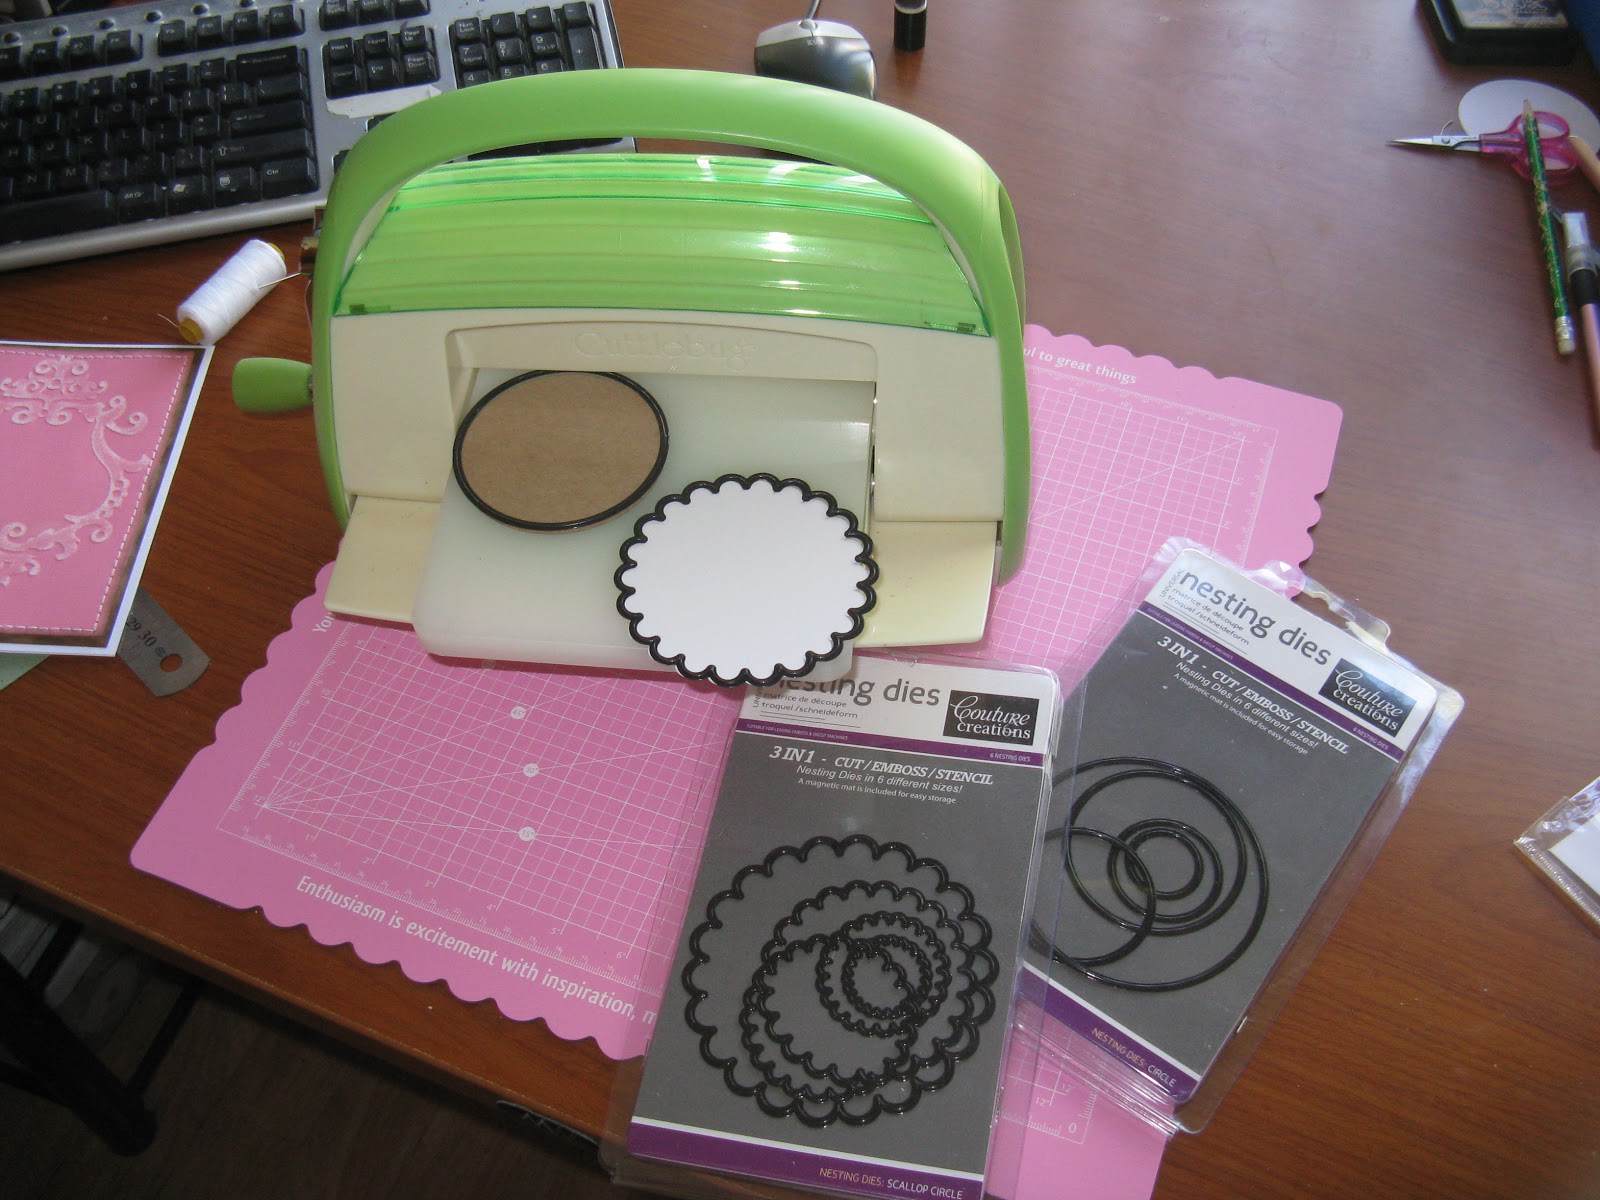
Next I used the must have circle and scallop circle nesting dies  These nesting dies are fantastic for just about everything!  The circles fit exactly on top of the scallop circles leaving a small border  or by using two different sizes together you can make frames.
 
I cut a circle from some kraft cardstock using the second biggest circle die and a piece of white cardstock using the biggest scallop circle die


Before I stuck them together, I stamped the kraft cardstock with a background stamp and inked around the edges.  I then attached it to the middle of the embossed cardstock.  Your card is now ready to be embellished with blossoms and a sentiment.  This is now adhered to a piece of kraft cardstock and can now be stuck to your white card base.
 
Here's another look at the end result.


To make the next card I ran a piece of the blue co-ordinations cardstock through the cuttlebug using the same embossing folder.  Again I sanded it back lightly and also stitched around the edges.
 
 
I then took a chipboard butterfly and coloured it by patting a blue inkpad over it and when it was dry I covered it all with some Crystalina Glitzin Glamour Glitter Glue.  I can't live without this.  I LOVE glitter but I hate the mess so this glitter glue is fantastic to use on your creations for that bit of extra sparkle.
 
Once the butterfly is dry I then attached it to the middle of the embossed piece.  I glued a flower and some twine into the centre of the butterfly, added a sentiment for my card and finished it off with some pretty pearls.  You can then adhere this to a white piece of cardstock.  It is now ready to be attached to your card base.


COUTURE CREATIONS PRODUCTS USED
 
 
Thanks for allowing me to share!
 
Until next time


Monday, April 1, 2013

Super Jungle by Lesa Bird


Hello Lesa here, I had a play with the Couture Creation All Occasions Embossing Folder Super Plush, and came up with this layout, it will go well in my holiday album.


Take 6.5" x 10" piece of pattern paper and insert into Couture Creations All Occasions Super Plush Embossing Folder. Fold excess paper around the back of embossing folder and put through die cutting machine.
After embossing ink the embossed image with a hard surface ink.


Cut matching cardstock with Couture Creations Victorian Rectangles Nesting Dies and emboss together and ink edge and embossed image.


Cut matching cardstock with Couture Creations Circle Nesting Dies and emboss. Ink edges and embossed image.
Place all elements onto base pattern paper as desired, finish with Couture Creations Glitzin' Glamour Crystlina. glitter glue.

Click HERE for a printable Sketch
and HERE for printable instructions
Couture Creations Products used
Stay Safe and Enjoy Your Day