Showing posts with label pearls. Show all posts

Tuesday, December 3, 2013

Glittered Christmas Cards by Sue Smyth


Red Robin Glittered Christmas Card 
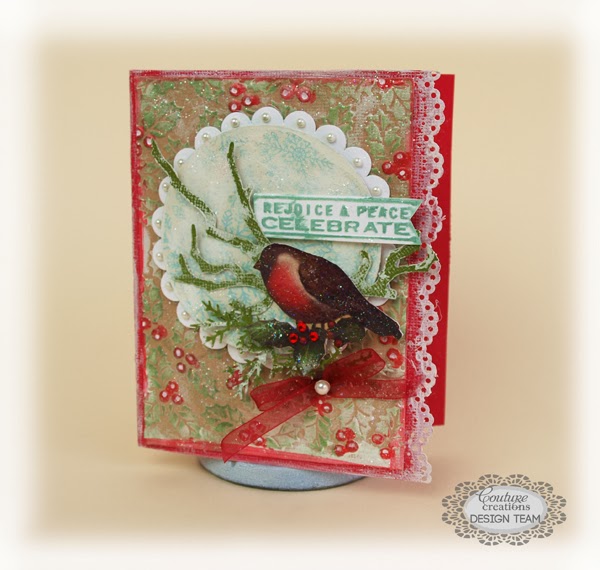

Today I am sharing a sweet little card made with Couture Creations Vintage Christmas paper pad 

Cut out a small A 5 card and trim off one edge with a punch
Emboss Kraft cardstock with Moonlit Berries Wrapped in Joy C0723596
Dry brush with gesso and allow to dry.
Ink with green ink and paint in the berries with a cotton bud and Inka Gold red metallic paint
Adhere to card front. 


Cut Scallop Circle from white cardstock with
and then the reverse of the robin paper from the pack with
fussy cut robin and place over scallop and circle as pictured.
finally apply a red bow along with  
and
as pictured 

Handy Hint if you love glitter like I do, lastly spray the entire card lightly with a paper 
varnish and sprinkle with white glitter. This is a really great way to hide any mistakes lol.


Glittered Christmas Greeting Card 


Today I have created a Christmas cards with Couture Creations 5 x 7 embossing folder  C0723597

This matches some of the images in the Couture Creations Vintage Christmas paper pad C0723551
So I have combined both to create a card with dimension 


Emboss Kraft cardstock with Christmas Carols embossing folder 
and gently rub over red ink


Dry brush edges with gesso.
Then rub with Inka Gold red metallic paste.
Adhere to a 5 x 7 red cardstock card

Trim out matching image from Vintage Christmas pack.
Use a crackle stamp to create crackle and swipe over with Dimensional magic, allow to dry 
Matt with red cardstock 
Adhere to card front with 3 D foam tape.
Decorate as desired with bakers twine and punched leaves and 
Couture creations gems 

Handy Hint use a white paint pen to fill in detail in images and faux stitching 

Lastly spray the entire card lightly with a paper varnish and sprinkle over white glitter. For
a glittery sparkle.
 
Couture Creations Products Used Red Robin Glittered Card
 
Couture Creations Products Used Christmas Greeting Glittered Card


Happy Crafting & Merry Christmas  

Thursday, November 28, 2013

Christmas Tree Ornament by Dana Tatar


Hi Couture Creations fans! Dana here today sharing a Christmas ornament that I created with pieces of embossed chipboard. This project started out as a mini album kit. Instead of using the triangular tree portions as pages, I glued them all together to create a fun and colorful ornament for the tree!


I embossed each section of the tree with the Wild Holly Embossing Folder. I painted the front and back of each piece with a light coat of gesso and then a colorful Gelato. I highlighted the embossing with Silver Inka-Gold. I dipped the edges of each colorful tree segment in white acrylic paint for a frosty feel. Once the paint was dry, I glued the sections together to form the tree. No Christmas tree is complete without bling, so I embellished the tree with Moonlight Self-Adhesive Pearls and Silver Glitzin' Glamour Glitter Glue.


I created a photo frame for the back of the ornament with the Scalloped Oval and Oval Nesting Dies.


I finished embellishing the back of the ornament with a stamped sentiment and Moonlight Self-Adhesive Pearls.

Thanks so much for stopping by today!


Couture Creations Supplies:
CO723593 Wrapped In Joy Collection - Wild Holly Embossing Folder
CO723045 Scalloped Oval Nesting Dies
CO723044 Oval Nesting Dies
CO721998 Moonlight Self-Adhesive Pearls
CO721970 Silver Glitzin' Glamour Glitter Glue

Monday, November 25, 2013

Miracle by Patti Hamil

Today I wanted to share a layout of our Granddaughter right after she was born! She is almost five months old now, time is passing too fast! I wanted a soft look so I kept the colors neutral with pink and a little bit of green.


Here are some close-ups of the details. I used the Poetry folder from the Elegance collection on a soft pink cardstock and then inked over it with white. It just suits the sweet photo!


I made the blooms from the Daisy Nesting Die! I used some chalk ink, Glitzin Glamour and Pearls!!!


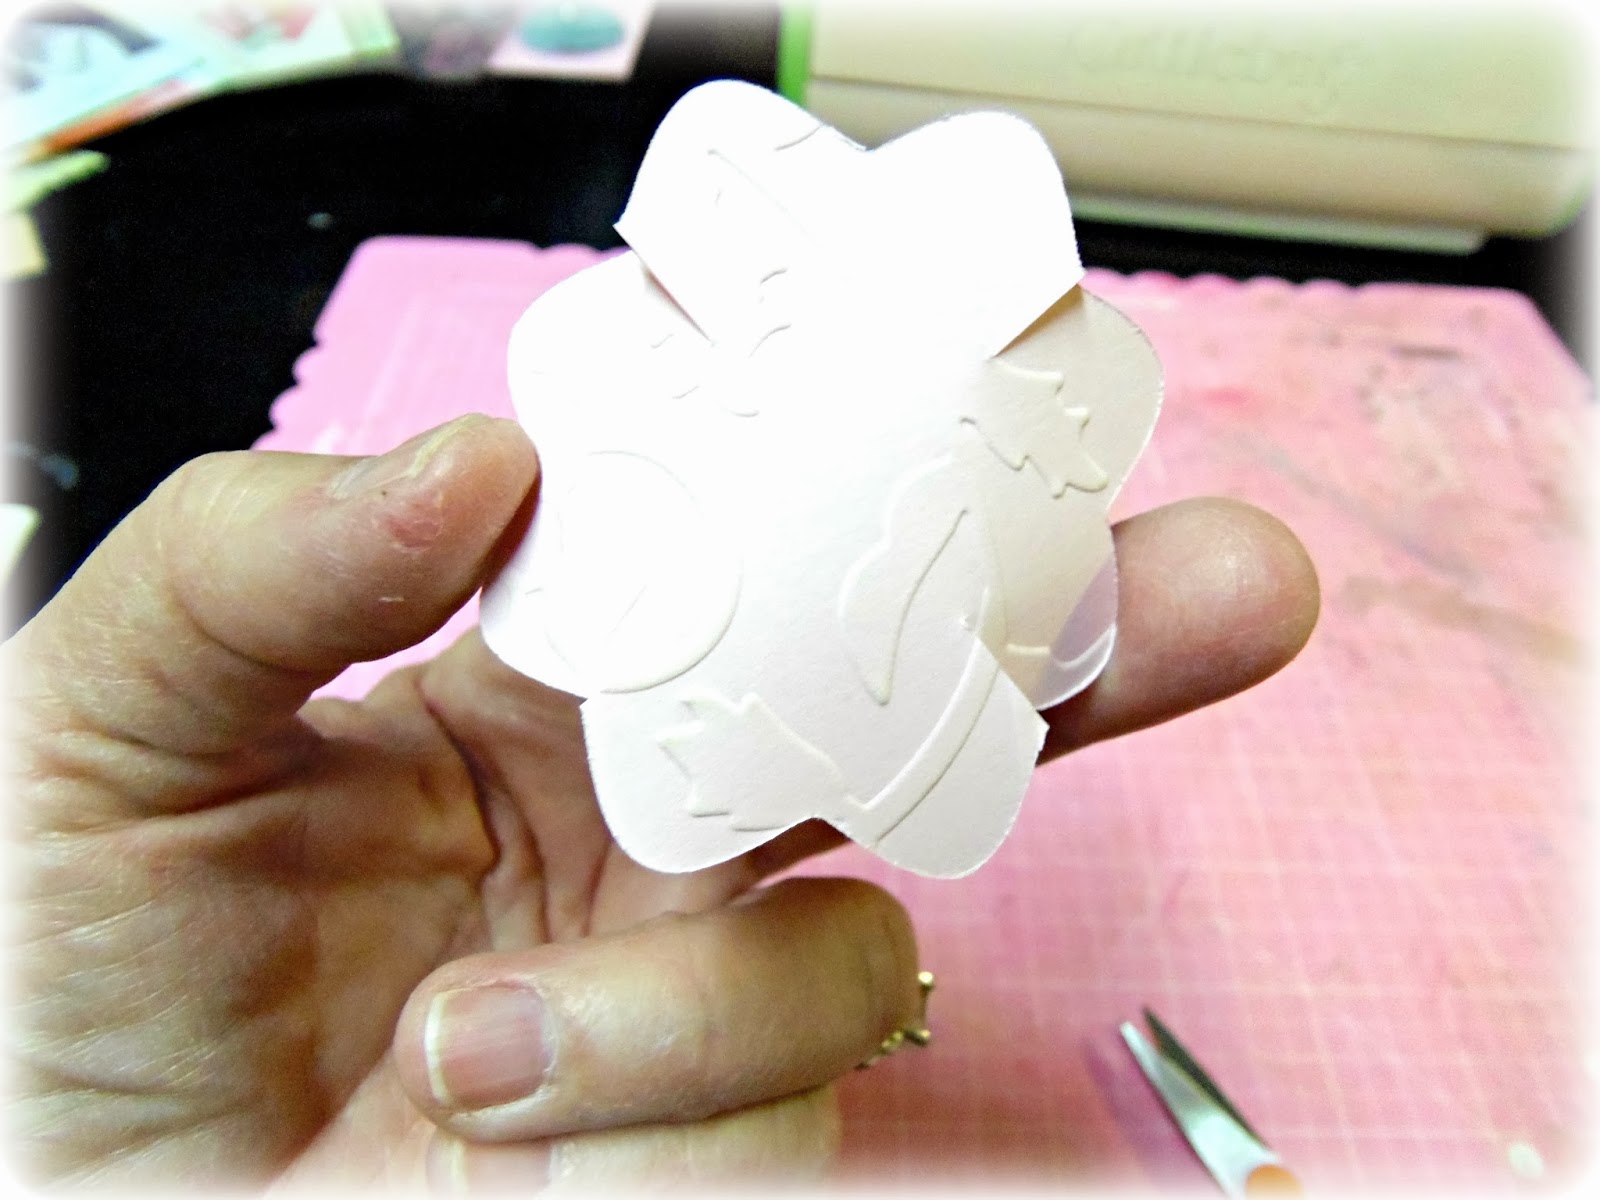
Start by snipping into every second petal as shown below:


 Trim each side of the double petals to look like the one below, ink across each section and in the center.


Add a pearl and Glitzin Glamour around it to finish off the bloom! 


Couture Creations products used:

Friday, November 15, 2013

Taylor by Patti Hamil


Hi, I have a layout to share using some different Couture Creations products! I used a couple of dies and also a couple of folders! You can use these for accents and still get a big effect! I used scrap paper on this page, besides the dotted background. I added a couple of Coordinations tags and some alpha stickers.

This is our youngest son's fiance, and we are so happy to have her join our family!!! She is beautiful inside and out!


Here you see where I made some blue flowers with the Daisy Nesting die, and used one of the Sophia dies for the leaves! I added a self-adhesive pearl for the center. I also used a scrap of an embossed paper where I had used the Taylor embossing folder!!!


Here you see two more types of flowers made with the Daisy nesting die, and also some self-adhesive gems and another Sophia Intricutz die!!!! I added gems to some areas of the gold accent.


Here you see where I embossed two of the Coordinations tags with the Craisy Daisy folder!! I inked them lightly with white ink.


one more close-up.


This page came together using scraps and just a few accents! I like to go through my scrap pile and see what combinations I can come up with! Then adding some Couture Creations and you have a super page!!! Thanks so much for stopping by!!!

Patti


Couture Creations products used:

Tuesday, November 12, 2013

Christmas Kids by Sue Smyth


This Christmas layout is a little different using Hot pink, teal and white as a colour theme.
Couture Creations Jolly Christmas Paper pack has loads of papers suitable for this 
colour theme.
I little trick here is if you do not have a photo to suit these colours, simply
have your Christmas photo printed in Black and White or Sepia as I have done.

Couture Creations Pink Blush pearls sit inside paper flowers nicely

Cut out circles from patterned paper, ink the edges and follow the steps below to
create cute baubles. 
 

Snowy Baubles 


Apply White dimensional paint to the tops of baubles.

Sprinkle with white glitter and allow to dry.


Couture Creations Products 
Thanks for stopping by and 
Happy Crafting 


Tuesday, October 22, 2013

Oh Christmas Tree by Kerrie Gurney

Hi all it is me Kerrie again with a super quick but different card that you can mass produce for Christmas your Christmas giving


I have used the A2 Early Morning Embossing folder from the Wrapped In Joy collection, Core'dinations ColorCore Cardstock, some Couture Creations Pearls and some seam binding ribbon.

 
cut a piece of Core'dinations cardstock to 8.5" x 4.5" and fold into a gate fold


Emboss Early Morning onto a piece of Core'dinations cardstock

 
Cut straight down the middle and sand to revel core colour

sand the edges of base card

place double sided tape across middle of card

 
attach ribbon to both sides of gatefold allowing enough to tie into a bow


add embossed sections to front of gates, add some pearls and tie a bow to close
 
 
Tip you could add a pocket to the inside of the card and pop a gift card inside.
 
 
Couture Creations Products Used
 
 
Don't forget to enter our Facebook giveaway


Sunday, October 20, 2013

Visiting the Colosseum by Kerrie Gurney

Hi It's Kerrie again with a quick and easy technique to show you


I created this layout using the tan embossing mat to emboss my die instead of using it as a die cut.


What you need to create this technique 
Couture Creations Tan Embossing Mat, Sophia Choo Decorative Die, Core'dinations Cardstock

This is how to use your Decorative Dies to create an embossed image

Use your embossing sandwich and layer with acrylic plate, decorative die blade side up, Core'dinations cardstock textured side up, tan embossing mat, acrylic plate (if you use a Cuttlebug use both B plates)


run through machine, I ran it through twice to give extra depth


Sand lightly to show core colour, distress all edges of patterned paper and carstock using your scissors.
Layer all the pieces onto page and finish off with a row of pearls


 here is a close up look at the embossed detail


Couture Creations Products Used
 
 
Don't forget to enter our Facebook Giveaway


Happy Creating