Showing posts with label Cards. Show all posts

Tuesday, December 10, 2013

Jolly Christmas Cards by Adriana Bolzon


Hello there everyone, It's Adriana here and
is it my turn again today 
Today I have created another very simple and easy christmas card, for
the background I embossed some white cardstock with the
the new Wrapped in Joy embossing folders 
this one is called
"Jolly Christmas" C0723595.


At the top of the card I used the Diecut 
 from Magical Christmas Diecut collection called
"Tinsel "  CO723567.


I cut a circle from the Couture creations
 Circle Nesting Dies for the bauble.

Adding some ribbon, flower and leaves.


also here is another Christmas card using the
cut to create the square doily background in green pokadot paper.


Thanks for looking :)
Hope you have time to create some christmas cards too.
Merry Christmas to everyone. :)
 

Wrapped in Joy embossing folders CO723595 Jolly Christmas
"Tinsel" CO723567 Magical Christmas Die cut

Please make sure you add your email address to get the latest newsletters.

Don't forget to join 
Couture Creations FACEBOOK

for all the latest updates from Couture Creations.
Thanks for looking
Cheers Adriana xx:)

Don't forget to enter our

12 days Giveaway
We have 3 Couture Creations Prize Packs valued at $50AUD each to giveaway
all the Details on how to enter are HERE

Sunday, December 8, 2013

Sweet Happy Birthday Card by Jo Piccirilli

Hello!  Hope you are all well and enjoying the lead up to Christmas. 

Today I have a card to share with you using the new Large Joe's Garden embossing folder and a quick tutorial on how I achieved the colour on the card. 


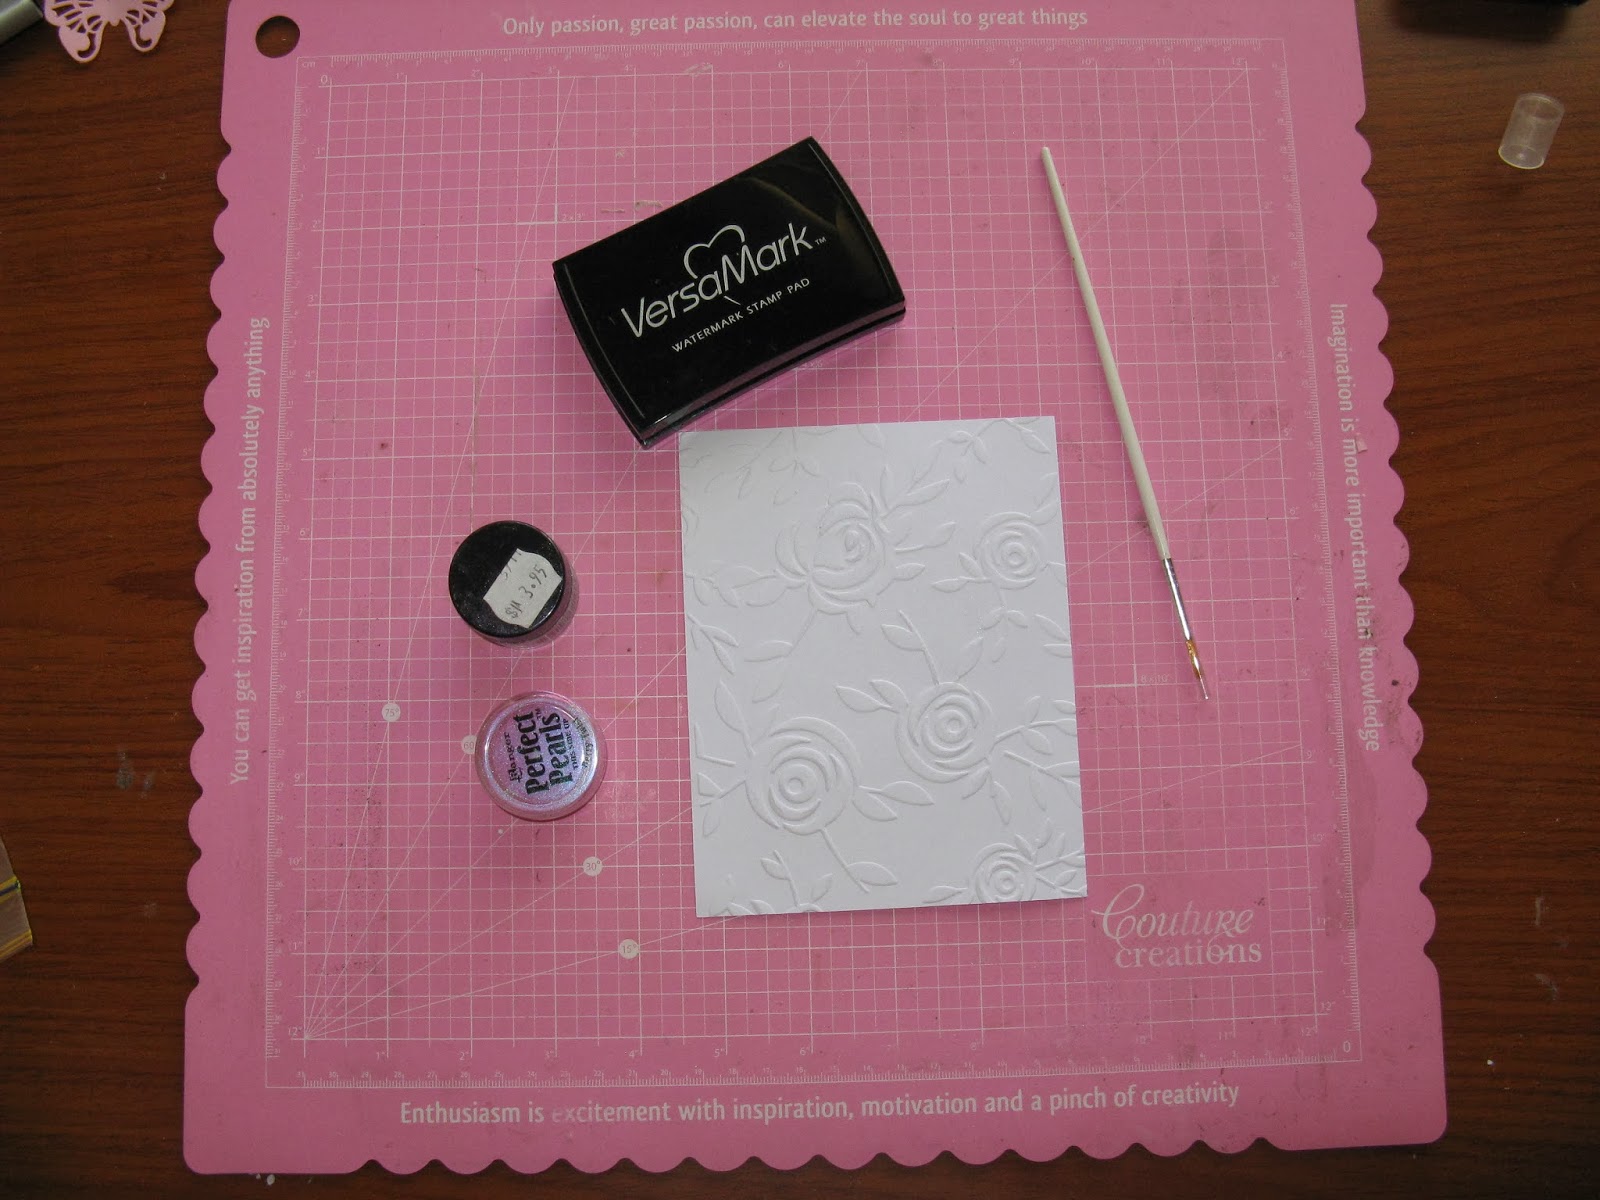
Here's the supplies you will need.


Using the Joe's Garden Embossing folder, emboss some white cardstock.

Next grab some Perfect Pearls and a Versamark inkpad along with a fine paint brush.

Very gently rub the Versamark inkpad over the raised part of the cardstock.  Be careful not to press to hard.


Very gently brush over the wet part with some Perfect Pearls and flick off the excess.


Once you have finished colouring your embossed card, give it a light mist with a water spritzer.  This will "set" the powder and give a soft and shimmery effect.  Its a little hard to see in the photo but trust me this really is shimmery!.

I have then added my Alycone Doily from the Royal Jewels Collection and also used my Circle and Scallop Circle Nesting dies for my sentiment to finish my card and of course some hand stitching with my paper piercer from the 3 in one Tool Set.

Thanks for stopping by and a very merry and blessed Christmas to you all.
 
Don't forget to enter our
12 days Giveaway
We have 3 Couture Creations Prize Packs valued at $50AUD each to giveaway
all the Details on how to enter are HERE

Couture Products used.

Large Joe's Garden Embossing Folder All Occasions Collection CO723451
Alcyone Doily die Royal Jewels Collection CO723112
Scallop Circle Nesting Dies CO723041
Circle Nesting Dies CO723040
Double Sided 6mm Tape
3 in one Hand Held Tool Kit


Thursday, December 5, 2013

Easy Christmas Card by Bridget Louw


Hi Bridget here again with my last Christmas card for 2013. This one is super quick and easy to make thanks to the amazing range from Couture Creations products.

The card measures 5” high x 5.5” wide.

The first step is to cut some marker blending card with the largest die in the set C0723049 Nesting Dies: Victorian Rectangles


Stamp the Christmas image you have chosen on the shape and colour as desired. Put the image back into the die and lightly sponge/chalk all over. Once you take it out of the die again their will be a very pretty white border around it.

The next step is to cut the layer to go behind the stamped image. For this I put the die on my patterned paper and cut around it with a craft knife, that way you can create a shadow layer just slightly larger than the actual die cut.


Using some patterned paper I cut 2 layers for my card and punched them with a border punch.

I stamped a sweet Christmas sentiment onto a piece of card I had cut using
C0723050 Fleur de Frame Die Set.


Tie a piece of ribbon across your two panels after assembly, and add a bow.


Using C0721963 Foam mounting Tape I attached the stamped image and the sentiment to my card.

Super quick, super easy.

Couture Creations products used


I hope you like my card and will try making it with the amazing product range from
Couture Creations.

Join us on Facebook and don’t forget to “like” our page.

https://www.facebook.com/couture.creations.aus


Tuesday, December 3, 2013

Glittered Christmas Cards by Sue Smyth


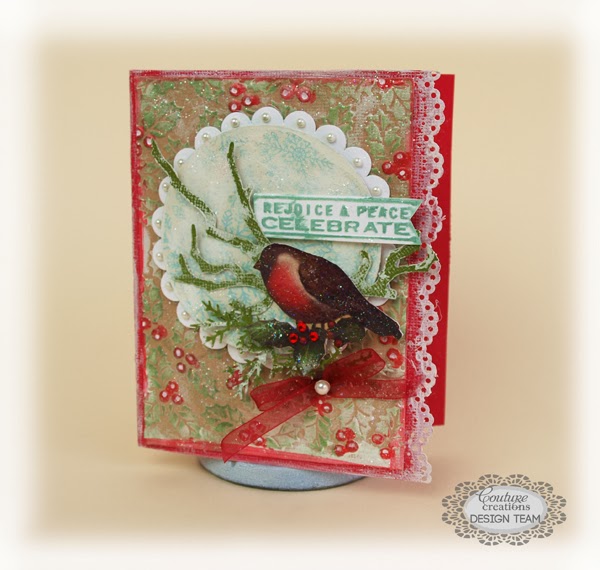
Red Robin Glittered Christmas Card 


Today I am sharing a sweet little card made with Couture Creations Vintage Christmas paper pad 

Cut out a small A 5 card and trim off one edge with a punch
Emboss Kraft cardstock with Moonlit Berries Wrapped in Joy C0723596
Dry brush with gesso and allow to dry.
Ink with green ink and paint in the berries with a cotton bud and Inka Gold red metallic paint
Adhere to card front. 


Cut Scallop Circle from white cardstock with
and then the reverse of the robin paper from the pack with
fussy cut robin and place over scallop and circle as pictured.
finally apply a red bow along with  
and
as pictured 

Handy Hint if you love glitter like I do, lastly spray the entire card lightly with a paper 
varnish and sprinkle with white glitter. This is a really great way to hide any mistakes lol.


Glittered Christmas Greeting Card 


Today I have created a Christmas cards with Couture Creations 5 x 7 embossing folder  C0723597

This matches some of the images in the Couture Creations Vintage Christmas paper pad C0723551
So I have combined both to create a card with dimension 


Emboss Kraft cardstock with Christmas Carols embossing folder 
and gently rub over red ink


Dry brush edges with gesso.
Then rub with Inka Gold red metallic paste.
Adhere to a 5 x 7 red cardstock card

Trim out matching image from Vintage Christmas pack.
Use a crackle stamp to create crackle and swipe over with Dimensional magic, allow to dry 
Matt with red cardstock 
Adhere to card front with 3 D foam tape.
Decorate as desired with bakers twine and punched leaves and 
Couture creations gems 

Handy Hint use a white paint pen to fill in detail in images and faux stitching 

Lastly spray the entire card lightly with a paper varnish and sprinkle over white glitter. For
a glittery sparkle.
 
Couture Creations Products Used Red Robin Glittered Card
 
Couture Creations Products Used Christmas Greeting Glittered Card


Happy Crafting & Merry Christmas  

Monday, December 2, 2013

Thanks for Being You by Lesa BIrd


Hi all, here is a super quick card, using couture Creations, 
embossing folder


Place your choice of card stock in Great Moments embossing folder and run through embossing machine


Place Crystal Adhesive Gemstones randomly around card and add some small paper flowers (these can be created using small circle nesting dies)


Using one of the Scalloped Circle Nesting Dies, cut one black and one white


stamp on a sentiment, trim off the over hang with your scissors, and your done 
So quick

Stay Safe and Enjoy Your Day


Couture Creations product used


Sunday, December 1, 2013

Happy Birthday Card by Adriana Bolzon


Hello there everyone :) is it my turn again today 
Today, I have a Happy Birthday Card to share with you all
and the Dream Boat stamping set from the 3-in-1 sets
Butterfly Notes C0723400


Firstly I stamped the butterfly image with the music notes and words 
from the 3-in-1 set around the top of my cardstock.


I embossed 2 sheets of cardstock with the
All Occasions embossing folder - JAZMYNE C0723293
  and cut out all the leaves, gently inking all the raised
areas of the embossed leaves with brown and green inks.
I then arranged them to create a cluster of
leaves and flowers.

 
Thanks for looking! 


Couture Creations Materials
Please make sure you add your email address to get the latest newsletters.

Don't forget to join 
Couture Creations FACEBOOK

for all the latest updates from Couture Creations.
Cheers Adriana xx:)


Tuesday, November 26, 2013

Gilded Joy Christmas Card by Cathi O'Neill


Cathi here with another gilded quick and simple card using a product that I have only recently discovered, but that can make your cards look rich and luxurious: Gilding Flakes! These multi colored flakes of gilding metals give an amazing sheen to anything they are used on. You can use glue and stamps to make stamped images colored in the metals or you can do what I did and use an adhesive sheet to make an entire metallic background.


Here I am holding onto a 5" x 5" square adhesive sheet, piling the gorgeous gilding flakes onto the surface. 


Use your fingers to smooth in the flakes onto the entire sheet and then you can use a stamp scrubber foam to get rid of any excess and buff it to a gorgeous sheen.


Next I took the gorgeous Wrapped In Joy: Poinsettia Lullaby embossing folder and embossed the gorgeous pattern into my gilding flake sheet.


I added a simple sentiment using the center die from the Fleur-de-Frame Nesting Die. I used the die as a stencil as well and inked through it with Walnut Ink Distress Stain and my Sponge Dauber.


I've added some subtle gesso highlights to help the embossed patterns stand out, stamped a sentiment on my label added a golden bow.


Another quick and simple card with an amazing luxurious look!!

Hope you enjoyed this tutorial and that you will share any work you do with these gorgeous dies and folders on our Facebook page!!


Couture Creations products used:


Friday, November 22, 2013

Product Showcase | Dream Boat 3 in 1 Collections Revisited

Our UK Distributor Creative Expressions had our Dream Boat Collection featured on Ideal World in the UK last week if you live in the UK and missed it here is the link, if you are not in the UK he is a look at our Dream Boat Collection.
Our Dream Boat collections combine stamps, dies and an embossing folder for quick, stunning projects in matching combinations…

 Butterfly Notes – CO723400
Doilies – CO723401
 Floral Wreath – CO723402
 Ornate Frame – CO723403
 Pattern Quilt – CO723404
Party Time – CO723405


For inspiring projects created using our Dream Boat Collection follow our board on Pinterest

 
 View our Design Team's projects including step by steps using Dream Boat Collection
HERE

 
https://www.facebook.com/couture.creations.aus