Wednesday, December 4, 2013

Product Showcase | Premium 12×12 Postbound Albums


Couture Creations Premium quality 12×12 inch postbound albums are replete with character and style. Each album is an absolute delight in a unique texture perfect for displaying your treasured projects and memories in style.
*Each album contains 30 top loading 12 x 12 inch sleeves with white paper inserts
*Scrapbooking and photo safe ( acid & lignin free )
 
Perfect for storing your treasured memories


https://www.facebook.com/couture.creations.aus


Reindeer Noses by Tracey Cooley

Hi Creators

Every year my 2 beautiful daughters like to give things out to their classmates. Last year was Rudolph chocolates and reindeer food.. this year they decided they wanted to give out reindeer noses....

I purchased some clear plastic bags, malteasers and jaffas' from my local supermarket. Adding 8 malteasers for each reindeer and 1 red for Rudolph to each bag. Cutting cardstock to match the width of my bags and the length required to go from the bottom of the bag and fold over for a front tab.
I then printed all the reindeers names on the back and the name of the contents on the front.

Then with the Couture Creations Scalloped Rectangle nesting dies I feed the cardstock through the die so only one end would cut and scalloped the front edge. I then stapled it to the bag of noses and set about making a cute Rudolph to decorate the front.


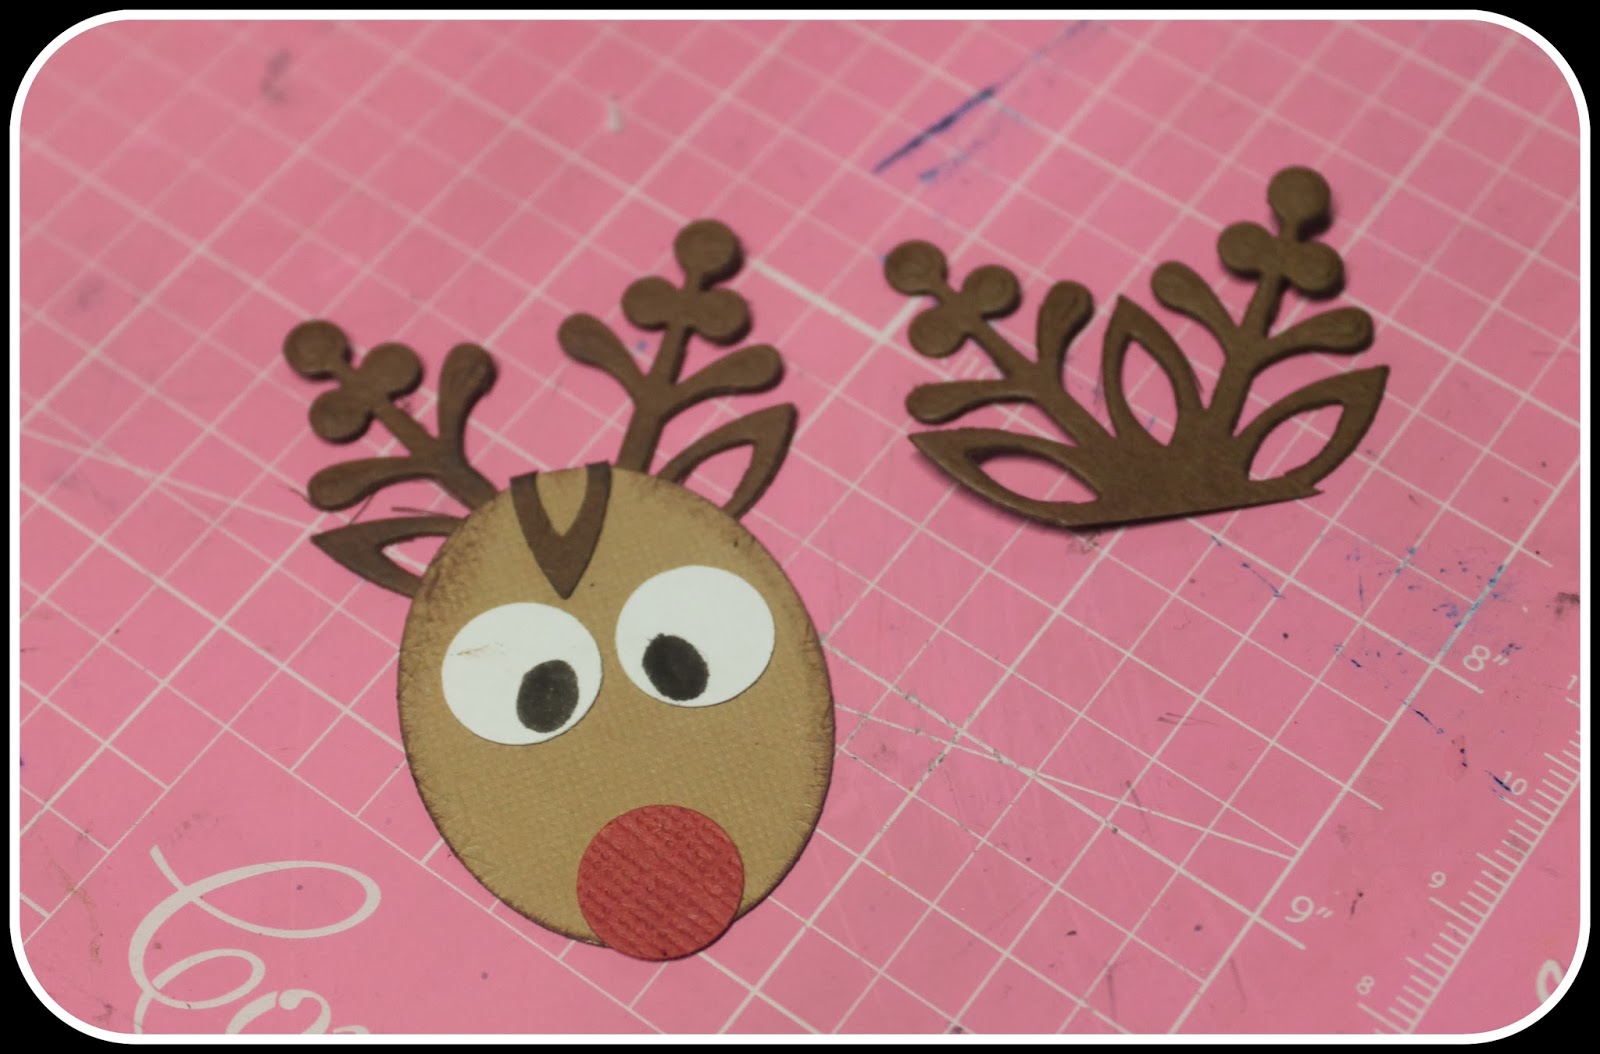
From the Couture Creations Oval Nesting Dies I cut 1 of the 2nd smallest ovals from light brown cardstock. Cut 1 Couture Creations Magical Christmas Tis the Season Die in a darker brown.
ink around the oval with a brown ink for definition.


Cut the snowflake so that 3 leaf shape and 2 stems shapes are left as above  ( you will get 2 from each snowflake)


add the half snowflack to your oval so that the leaf shapes become his ears and the stems become his antlers, folding the middle leaf shape over to form a tuft of mane. Add some small circles for eyes and a nose and viola.... RUDOLPH!! Attach this cute red nose reindeer to the front of your noses...repeat for all classmates and send to school!
 
Keep on Creating!
http://jordayla.blogspot.com.au/

Couture Creations Products Used
CO723044 Nesting Dies Oval
CO723047 Nesting Dies Scallop Rectangle
CO723557 magical Christmas Tis the Season
 

How can I prepare to establish a Christ-centered home?


If you haven't already heard, we had our baby! (you can read more about that here)
I have been eating up every second with our little guy, which has put me SUPER behind on my emails and blog!
But let's be honest, what beats spending time with a newborn? I can't think of anything better! 

On the little downtime I have had I have been reading up on the Come Follow Me outlines for this month!
The overall focus of the month is "Building the Kingdom of God in the Latter-Days".
I have loved studying the talks and scriptures that correlate to the lessons.
I feel like the messages are so important and have helped me personally think of ways to be a better mother, wife, and missionary!

I decided to create a couple fun handouts and lesson helps to spark some inspiration!
The handouts below directly coordinate to the lesson outline...

Feel free to print off , share, and use for your lessons!

You can download a PDF copy of the handouts and lesson helps by clicking on the links below.
I only provide PDF files, as the quality is much better for printing purposes
and I prefer the integrity of the designs not be changed or altered. Thanks for your understanding!


KEYS TO A CHRIST-CENTERED HOME
For a PDF download of the handout (2 to a page) CLICK HERE


NO PLACE LIKE HOME
For a PDF download of the handout (4 to a page) CLICK HERE

I also really loved this quote from Elder Scott,
because he emphasizes the many blessings we can receive from centering our homes around Christ,
Love.

Tuesday, December 3, 2013

Glittered Christmas Cards by Sue Smyth


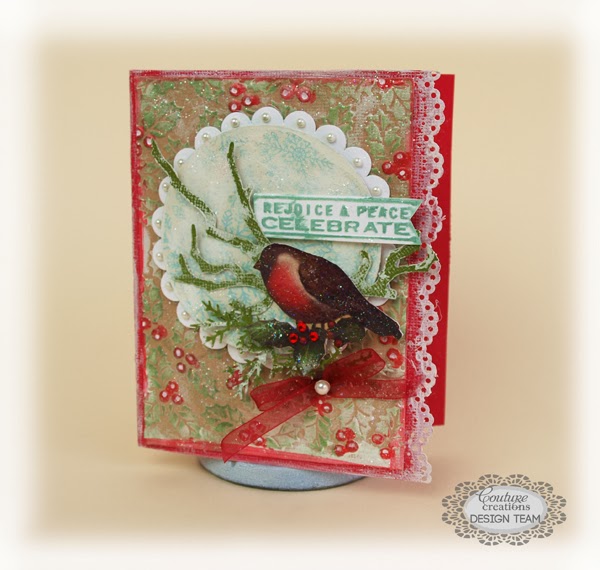
Red Robin Glittered Christmas Card 


Today I am sharing a sweet little card made with Couture Creations Vintage Christmas paper pad 

Cut out a small A 5 card and trim off one edge with a punch
Emboss Kraft cardstock with Moonlit Berries Wrapped in Joy C0723596
Dry brush with gesso and allow to dry.
Ink with green ink and paint in the berries with a cotton bud and Inka Gold red metallic paint
Adhere to card front. 


Cut Scallop Circle from white cardstock with
and then the reverse of the robin paper from the pack with
fussy cut robin and place over scallop and circle as pictured.
finally apply a red bow along with  
and
as pictured 

Handy Hint if you love glitter like I do, lastly spray the entire card lightly with a paper 
varnish and sprinkle with white glitter. This is a really great way to hide any mistakes lol.


Glittered Christmas Greeting Card 


Today I have created a Christmas cards with Couture Creations 5 x 7 embossing folder  C0723597

This matches some of the images in the Couture Creations Vintage Christmas paper pad C0723551
So I have combined both to create a card with dimension 


Emboss Kraft cardstock with Christmas Carols embossing folder 
and gently rub over red ink


Dry brush edges with gesso.
Then rub with Inka Gold red metallic paste.
Adhere to a 5 x 7 red cardstock card

Trim out matching image from Vintage Christmas pack.
Use a crackle stamp to create crackle and swipe over with Dimensional magic, allow to dry 
Matt with red cardstock 
Adhere to card front with 3 D foam tape.
Decorate as desired with bakers twine and punched leaves and 
Couture creations gems 

Handy Hint use a white paint pen to fill in detail in images and faux stitching 

Lastly spray the entire card lightly with a paper varnish and sprinkle over white glitter. For
a glittery sparkle.
 
Couture Creations Products Used Red Robin Glittered Card
 
Couture Creations Products Used Christmas Greeting Glittered Card


Happy Crafting & Merry Christmas  

Monday, December 2, 2013

Oliver Aitken: Month One

9 lbs. 2 oz.
22.5 Inches


My itsy bitsy Oliver turned one month old this week.
We kept him alive and healthy for one month people!
I am feeling like that is quite the accomplishment.

I have a lot of blogging to catch up on but I wanted to write down a few... 
ok... a lot, of things about Oliver during his first month of life. 
I don't blame you for not reading these - it is mostly for my purposes. 
I am sure they will get shorter with each month.

Everyone says he looks like his dad. 
I agree completely and love it.
 I really can't see any of me in him. Aitken baby for sure.

He has more hair on the back of his head than in the front and has random long spots. 
At times his eyes look a little green, but they are still in the "grayish" stage.

He is a complete mama's boy at this point. 
I can't tell you how much it melts my heart. 

He is still in newborn diapers, and up until last week, was wearing newborn clothes.
However, recently we had to move up to 0-3 month clothing simply because of his length!
I am shocked at how long he has gotten! Our little string bean.

He despises his binkie. Although he loves to suck. Go figure.
Sometimes I catch him sucking on his thumb.
It is pretty darn cute - although the dentist would probably say otherwise. 

He loves to eat. 
He turns his head to let us know he is hungry. 
Right now I am nursing and also supplementing with formula (due to a low milk supply)
When he does eat from a bottle, he attacks it with his mouth (throws head side to side)
and pulls the bottle towards his face using all his strength in his arms and hands.
As he eats he loves to grunt. It cracks Brett and I up. Weird and funny.

He falls asleep best when his head is on my chest and he is in the froggy position. 
He constantly keeps his hands up by his face - he was like that in his ultrasounds.

He loves to be sung to, especially primary songs.
Sometimes he likes being swaddled - sometimes not.
He LOVES being in the water. Bath time is an all time favorite in this household.
He does not spit up (hope I didn't just jinx myself).
He likes to be in his carseat and loves rides in the car.
He has had baby acne for about 10 days but we think it is going away.

He has had several blowouts.
He has also managed to pee all over Brett and I one morning 
as we were both trying to change his diaper and remained completely dry himself.
Classic.

I told my Dad that he is really advanced with how well he can hold his head up - I swear he is. 
He laughed and said "And so it begins - you already believe your kid is a superstar." 
I'd have it no other way.

Sleeping is definitely not his strong suit. 
We are up to three hours like clock work. 
Yes - I am tired. But I am SO grateful to have such an amazing helpmate. 
Even though Brett is back at work (he had three weeks of paternity which was pure bliss),
he never complains and helps out with the feedings every night.
I realize this is not always the "norm", and feel SO grateful for his help.
He is so selfless and NEVER complains of being tired.
I love overhearing Brett singing to Oliver through the walls late at night. 
The amount of tenderness and love that fills his heart for that little boy is so apparent.
I'm telling you - if anyone deserves a "Father of the Year" award, it is that man.
Words can't describe my love for him.

At around two weeks Oliver started looking around. 
I still remember the first time he looked deep into my eyes.
Honestly, from my experience, there is no better feeling in the world. 

Let's just say I am obsessed with this little face and think he is a great baby
{despite his sleeping habits} but maybe I am partial.
Now that we are on our own during the day, 
we are learning how to navigate through every day tasks like showering, cleaning and going to the store. 
I will admit - it is harder than I thought.
 I've laughed a lot - cried quite a bit - but loved every.single.second of his first month of life.
 I can only pray he has too.


Thanks for Being You by Lesa BIrd


Hi all, here is a super quick card, using couture Creations, 
embossing folder


Place your choice of card stock in Great Moments embossing folder and run through embossing machine


Place Crystal Adhesive Gemstones randomly around card and add some small paper flowers (these can be created using small circle nesting dies)


Using one of the Scalloped Circle Nesting Dies, cut one black and one white


stamp on a sentiment, trim off the over hang with your scissors, and your done 
So quick

Stay Safe and Enjoy Your Day


Couture Creations product used


Sunday, December 1, 2013

Happy Birthday Card by Adriana Bolzon


Hello there everyone :) is it my turn again today 
Today, I have a Happy Birthday Card to share with you all
and the Dream Boat stamping set from the 3-in-1 sets
Butterfly Notes C0723400


Firstly I stamped the butterfly image with the music notes and words 
from the 3-in-1 set around the top of my cardstock.


I embossed 2 sheets of cardstock with the
All Occasions embossing folder - JAZMYNE C0723293
  and cut out all the leaves, gently inking all the raised
areas of the embossed leaves with brown and green inks.
I then arranged them to create a cluster of
leaves and flowers.

 
Thanks for looking! 


Couture Creations Materials
Please make sure you add your email address to get the latest newsletters.

Don't forget to join 
Couture Creations FACEBOOK

for all the latest updates from Couture Creations.
Cheers Adriana xx:)