Showing posts with label Sweet Dreams. Show all posts

Friday, August 16, 2013

Just Us by Sue Smyth


Today I will share my latest layout for Couture Creations. To create the mixed media background, I have embossed 3 panels of white cardstock. Then trimmed them to fit my 12 x 12 panel. Adhere to the blue cardstock background and roughly brush over with gesso, and crackle medium. Once dry, spray with mists randomly.

To cover the Tattered Lace panels, spray with spray adhesive, and then coat with brown glitter. Allow to dry and attach to layout, then place photos over the top.


I have cut out the Bird house in cardstock and embossed with Gold embossing powder for shine.


I have added lots of fibre and beaded trim, if your trim is not the right colour, spray with mist to match the layout background.

Couture Creations Materials 
CO723459 Sweet Dreams Embossing Folder, Super Fancy That
CO723066 Art Nouveau Embossing Folder,  Courtship
CO723283 Elegance Embossing Folder, Celebrate
CO723427 Endless Dreams Decorative Die, Viva Birdcage
 CO723223 Fantasia Doily Die, Tattered Lace


COUTURE CREATIONS FANTASIA COLLECTION DOILY DIES 723223 TATTERED LACE
A2 Celebrate - CO7232835 x 7" Embossing Folders – Super Fancy That

Thanks for joining me and I hope you are inspired to try the mixed media background. 


Wednesday, July 24, 2013

30 Minute Project by Bridget Louw


Hi Bridget here again with another quick and easy project to make,using an array of wonderful Couture Creations products.


Every now and again I need to make a quick project in a hurry and this is my favourite “go-to” project. It is not heavily embellished and uses only one piece of 12” cardstock and one sheet of patterned paper. Thanks to the dies and embossing folders from Couture Creations this project takes under 30 minutes start to finish.

Cut your 12” sheet of cardstock in half, so 2 pieces 6” x 12”. 


Score both pieces at 4” & 8”. 


Place some Double Sided Tape (C0721984) behind the end panel of the one piece and overlap with the first panel of the second piece to create one long concertina.

To decorate each panel, cut 5 pieces from the patterned paper, measuring 3 7/8” x 5 7/8” each. The paper I used for this project already had 6 pieces measuring 4”x6” so I just trimmed them slightly smaller.

Using the Nesting Dies: Ovals (C0723045) I cut out the 2nd largest scalloped oval from 2 of the panels to put a photo behind. I die cut another oval from another small piece of patterned paper and embossed it with the Raphael embossing folder to decorate the first panel.


All that is left to do is to decorate each of the panels with ribbon, alphabet stickers etc. 


30 Minutes start to finish and your project is done.

Couture Creations products used


I hope you will try making this super easy project with the amazing product range from Couture Creations.

Join us on Facebook and don’t forget to “like” our page.


Sunday, July 21, 2013

Altered Gift Box by Cathi O'Neill


Hi Cathi here with an altered box using more of my Couture Creations dies and embossing folders!


Here is how the box started, I distressed the edges to give it an antique look, using my Couture Creations Sponge Daubers and Walnut Ink Distress Ink.


I embossed using the Sweet Dreams Collection: Ello Embossing Folder and some gorgeous lilac  glimmer cardstock and used punched strips of turquoise around the side and on the top of the box. I added some lace for more detail.  For the narrower strips on the side of the box I was able to use the continuous strip embossing that the built in slits in the Couture Creations folders included.


For the top of the box, I die cut the beautiful Fleur de Frame Nesting Die, and then 2 each of the 3 smallest Daisy Nesting Dies in turquoise vellum to make a flower. To make the flower I layered them all and attached them with a brad, then scrunched each layer. This turquoise vellum does not need water distressing to make the flower shape, but you can follow the tutorial done on this project here to make this quick and simple flower.


To add some dimension, I put the frame up on Couture Creations 6mm Foam Tape.


I also cut out the Endless Dreams Tip Toe die to add detail to the flower, treating them more as leaves for this.

Here is a look at the top of the box.


And here is another look at the completed box.


Hope you enjoyed this tutorial and that you will share any work you do with these gorgeous dies and folders on our Facebook page!!


 Couture Creations products used


Sunday, June 23, 2013

Couture Creations | Core'dinations Blog Hop Day 1 with Pam Bray


Welcome to Day 1 of the Couture Creations & Core’dinations ColorCore Cardstock Blog Hop!  
We’re so excited to team up with Core’dinations ColorCore Cardstock to share some inspiring projects with you this week, marrying our products together, what could be more perfect our Embossing Folders and Dies and Core'dinations ColorCore Cardstock.
Each day this week we will feature 2 of our Design Team showcasing their projects created using Couture Creations and Core'dinations ColorCore Cardstock products. 


We’ll be giving away a fabulous Couture Creations prize package at the end of the week, so be sure to play along and check back on Monday 1st July 2013 to see if you’re the lucky winner!

Here are the different ways you can play along with us –

1.      Like Couture Creations on
Facebook 
2.      Share this blog post on your Facebook wall and tell us you did on our
Facebook
3.       Follow our
Couture Creations Blog
4.      Comment here on our blog or on
Facebook
5.      Follow Couture Creations on
Pinterest

Core’dinations ColorCore Cardstock is also posting projects and giving away prizes, so be sure to check out their Blog and Facebook page, too!


I love doing blog hops they are so fun to see what others create using some of the same mutual products. The design teams from Couture Creations and Core'dinations will be sharing all week projects that will inspire you to use your dies, embossing folders and core papers from both Couture Creations and Core'dinations in some fun ways. Today as a design team members for Couture Creations sharing I will be sharing with you a layout sketch on  Couture Creations Pinterest account.

 
Don't you just love the sketch...make sure if you love Pinterest to check out the other fabulous ideas.

 
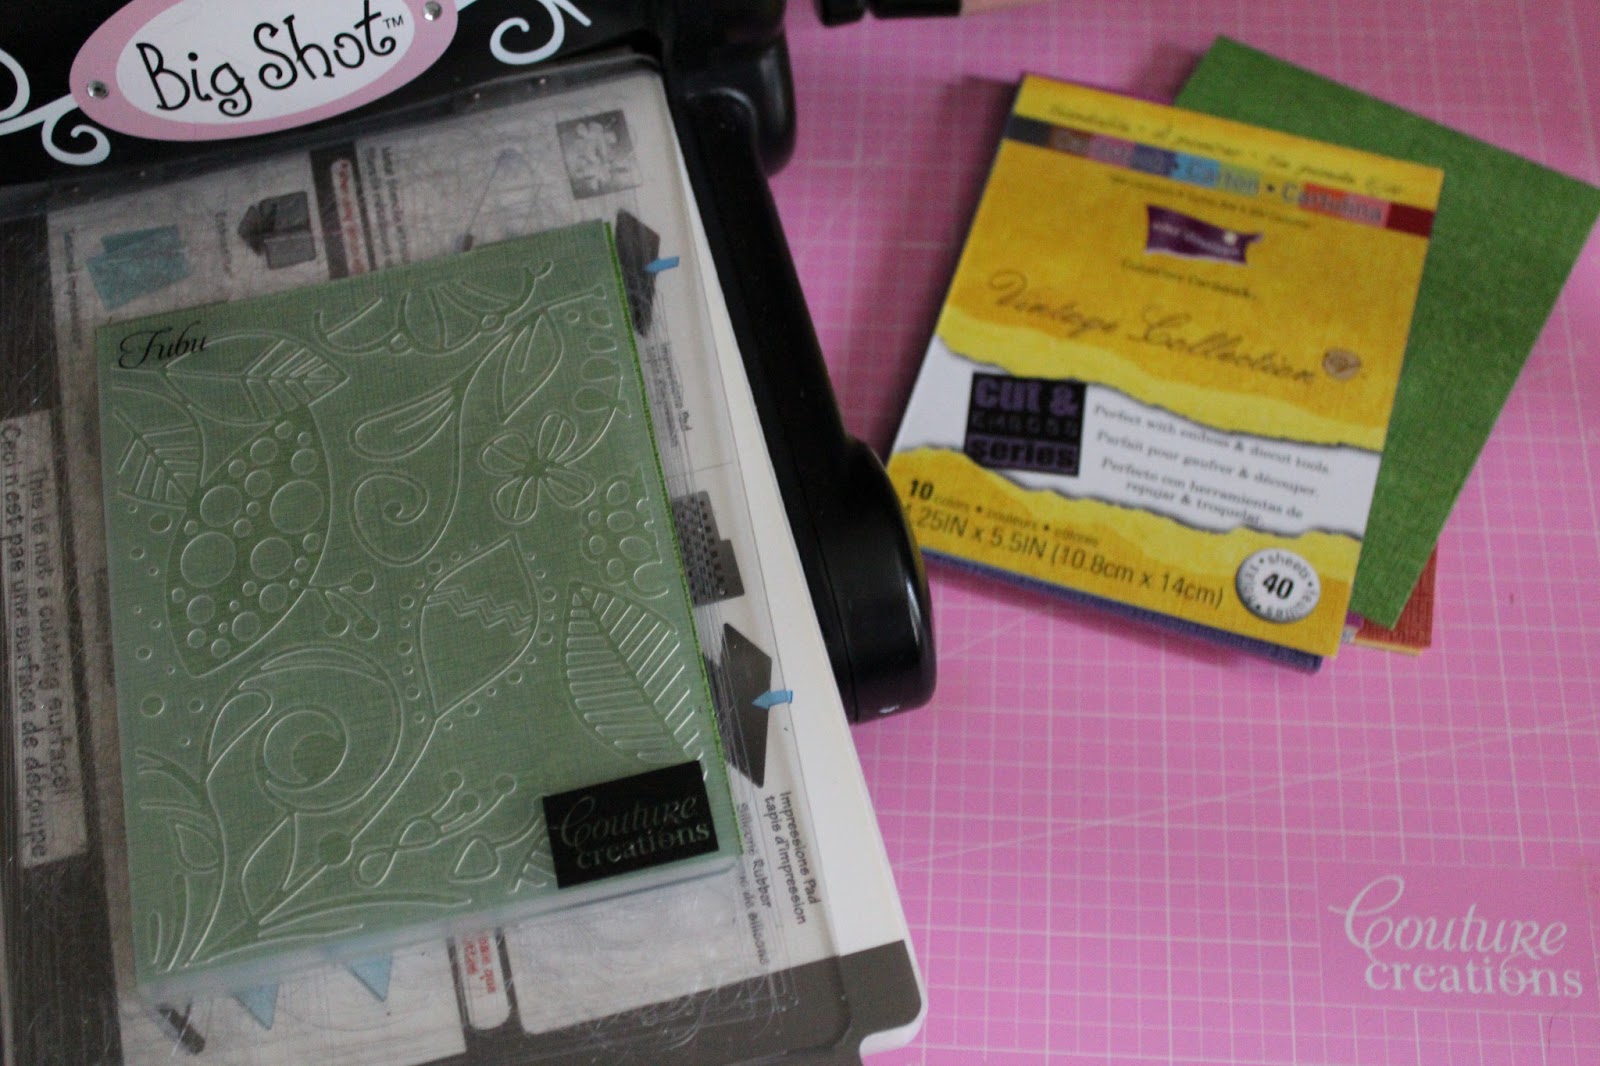
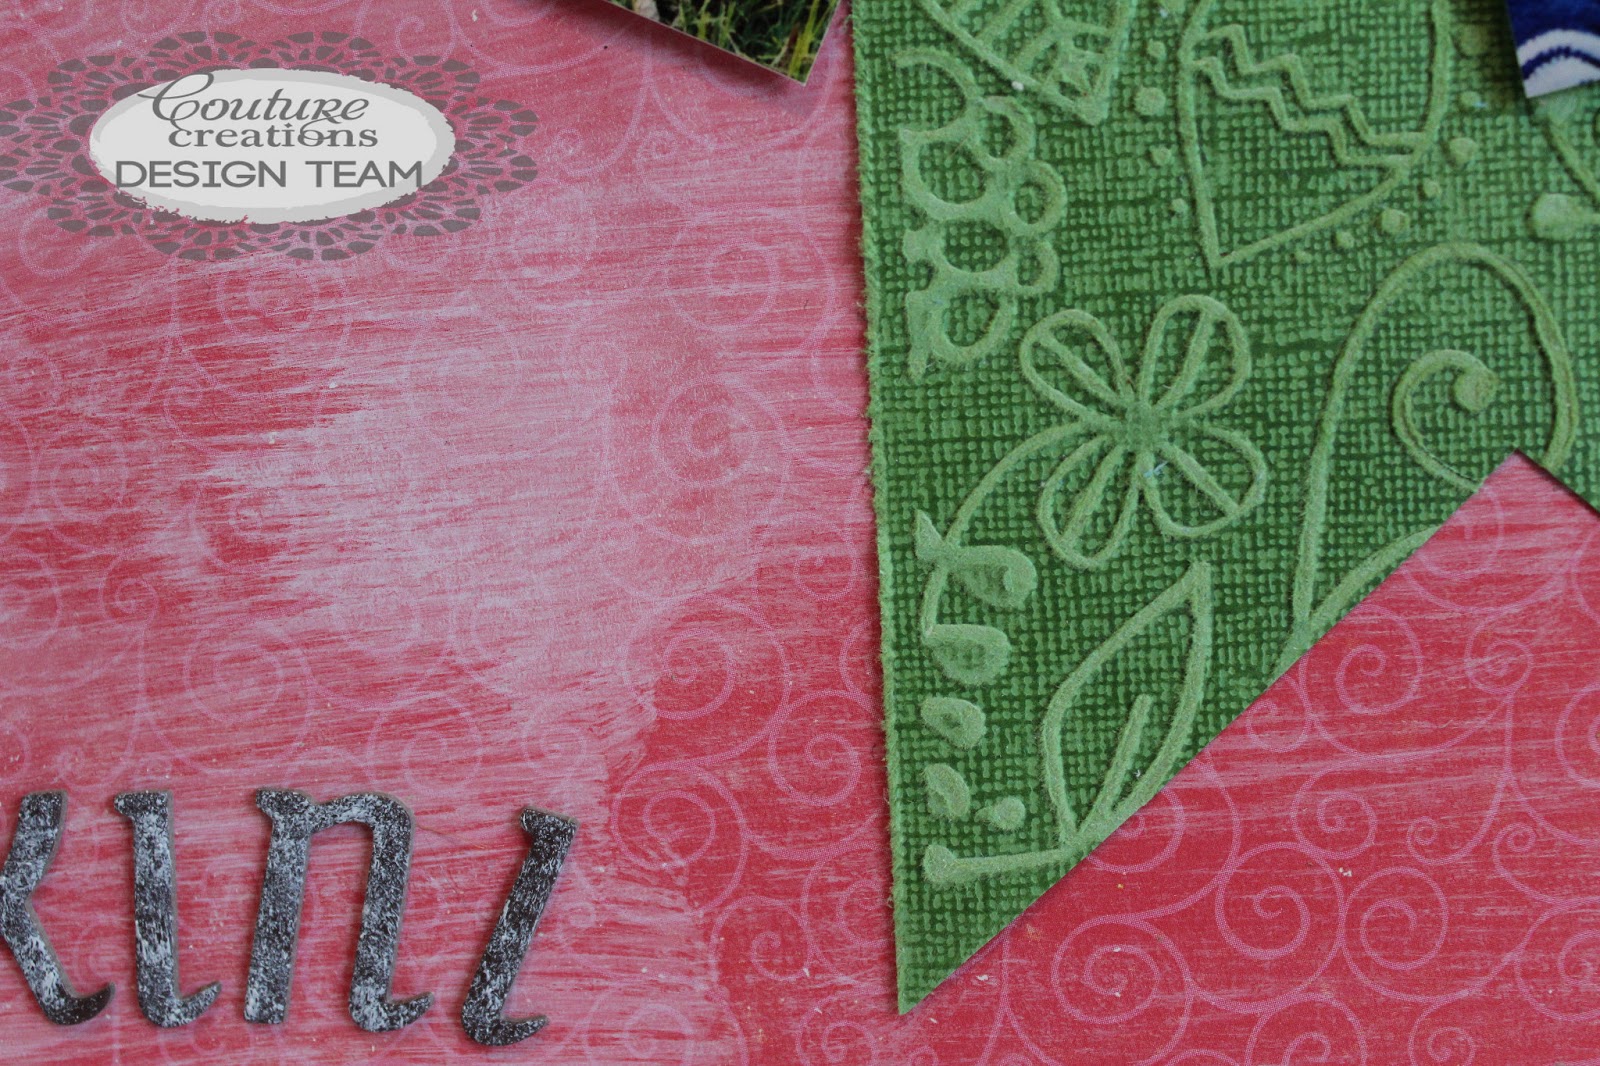
I started my project by running some of the green and blue Vintage Collections from Core'dinations through my Fubu Embossing folder from the Sweet Dreams Couture Creations Collections.

 
I sand each of my green vintage papers using my sanding block and wiping the dust off with Core'dinations Dust Bunny...it is a fabulous.

 
I then took several of the flag stickers off of my sticker sheet, placed them on the blue vintage paper from Core'dinations and ran them through my die cut machine with the Fubu Embossing Folder.

 
I once again sanded them off using my sanding block and wiped them the Dust Bunny.

 
I cut around the flags with my Couture Creations Precision Scissors.

 
I cut a fish tail flag from one off my embossed green vintage paper that had been sanded and distress and attached it to the top of my dry brushed and distressed pattern paper using Couture CreationsTwo Sided Tape.
 
I added some more of the stickers, punched out paper borders to the top of fishtail tag, along with the banners that I had embossed to the top of my photos with Couture Creations Foam Tape.

 
I wanted to make sure you see that I distressed the top piece of pattern paper prior to placing it on another piece of pattern paper. I achieved this look by going around the edge with my Precision Scissors making sure that some of the paper was torn. I added some Couture Creation Bling to the top of my border and a fussy cut bird from a piece of the pattern paper.

 
I hope you enjoyed my Bikini Time Layout today and make sure to check out the other designers blogs as well as Couture Creations and Core'dinations Blogs...I am sure you will want to follow them for more fabulous and creative ideas.

 
Couture Creations Supplies:
CO723306 Fubu Embossing Folder from Sweet Dreams Collection
CO721956 Precision Scissors
CO721961 Foam Mounting Tape
CO721957 Self Healing Cutting Mat
CO723060 Sand Block
Handheld Essentials
Clear Gemstones
 
Core'dinations Supplies:
Vintage Collection
Dust Buddy


Hop over to the Core’dinations ColorCore Cardstock Blog and see what their Design Team has created using their ColorCore Cardstock and our Couture Creations products! They also have  giveaways, so what are you waiting for – hop over!  oh and don't forget to follow our Design Team Blogs


Bridget Louw 

Cathi O'Neill 

Dana Tatar 


Lesa Bird 


Tracey Cooley 

Check in again with us tomorrow for more inspiring projects from Couture Creations & Core’dinations ColorCore Cardstock 

Hugs Pammejo 


Monday, June 10, 2013

Capture the Moment by Lesa Bird

Hi there it is Lesa

This month I thought I try something a little different with the Couture Creations Super Plush Embossing Folder, so I am having a little play with clay.


Roll out some clay (air dry or over dry both work well) thinly and large enough to fit the folder, trim off top edge to make it straight, dust both sides of your Super Plush Folder with a little power, will help clay not to stick, place clay in folder and using a rolling pin roll over Folder firmly a couple of times, then carefully lift out.


Using the Couture Creations Precision Craft Knife and a ruler trim of excess clay, then cut clay into1"x1" squares, place aside to air dry, or pop in the over using directions on clay packaging,


Create an open circle using 2 of the Couture Creations Circle Nesting Dies, pop them together through your machine making a circle with a hole, emboss circle using Couture Creations Sweet Dreams Only one, run some glue over embossed areas and dust with glitter.

Cutting a strip of cardstock at 3x10" emboss along one edge using the Only One Folder, glue and glitter.


Once your clay cubes are dry, cover them completely with paint, let dry, use a hard surface ink to highlight the embossed pattern.


Arrange all elements to suit, Title, Chipboard etc. Adhere with Couture Creations Double Sided tape.

Cut list for project
Pattern Paper  6.5x8.5"
Embossed card 3x10"
Cardstock mat 7.5x5.5


Click HERE to print Sketch, and HERE for your pin Point Instructions


Couture Creations products used;
CO721984 12mmDouble Sided Tape


Stay Safe and Enjoy Your Day